
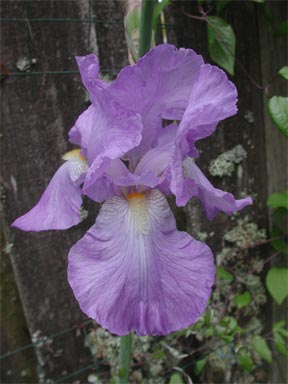
All of the following was done using PhotoShop Elements. You can click on the individual pictures for a larger image.
The first step was to remove the background using the polygonal lasso tool. Zoom in when using this tool.
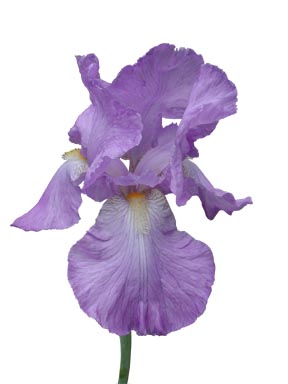
Next duplicate the layer. Using the Enhance-Color-Remove Color convert the top layer to black and white. Using the Enhance-Brightness/Contrast command increase the contrast to bring out the texture as desired.

Use Filter-Artistic-Dry Brush tool blur the second layer.

Return to the black and white layer and click on the layer tab in the upper right hand corner. Adjust the opacity of this layer using the slider. I used about 60%.

Use the Layer-Merge command to combine both layers. Adjust the color use the Enhance-Color-Hue and Saturation command to adjust the color saturation as required.


No comments:
Post a Comment